
The Anatomy of a Card
I recently watched an excellent (1:20 long) video on tarot cards, which goes into a lot of detail and nuance on the differences between different card stocks and treatments. It is definitely worth the watch (especially to see printing applications in practice) and inspired me to organize my thoughts on card stock, treatments, and finishes.
It is a confusing and complicated topic. There are innumerable processes, terminology that changes depending on who you talk to, and plenty of articles that over-simplify important concepts (it’s about more than gsm).
I am not an expert on printing, this is all stuff that I’ve learned from scouring the internet and manufacture webpages. So, be sure to speak with your manufacturer about what solutions work best for your game, and don’t be shy to ask for samples.
Without further ado, the anatomy of a card.
Material & Cores
There are three main types of material that you’ll see talked about for cards:
Art Paper: is thicker, stiffer and designed first for display purposes.
Card Stock: is durable, has a core and holds up to shuffling and use.
Plastic: has the highest durability.
There are of course plenty of other types of materials you can find, like wood, carbon fiber, and even metal. For our purposes, I am going to be focused on card stock as a substrate. Art paper is cheaper and might be useful for prototypes, but I wouldn’t recommend it for cards that are going to see a lot of shuffling. And plastics, well, I haven’t done much research into plastics.
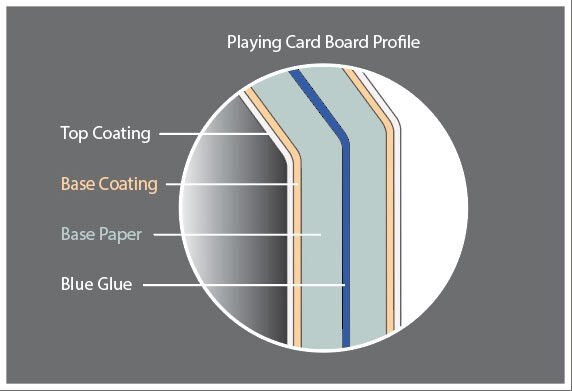
Card stock is made by gluing two layers of paper together. The binding agent is often referred to as a plastic, but it is usually a graphite laminate. This is also called “the core”.
The core is what gives cards their “snap”, resilience to bending (less likely to crease), improved shuffle, and durability.
The sheets receive a coating and are calendered (run through a bunch of rollers) to achieve the desired surface.

Most manufactures offer a number of cores, which relate to how premium the card stock is. A typical ordering would be:
Gray Core
White/Ivory Core
Blue Core
Black Core
But, this ordering isn’t universal. Panda GM for instance offers Blue Core as their base line, with Ivory Core at intermediate, and Black Core as the most premium. I am sure there are differences beside core that contribute to the quality of a card stock.
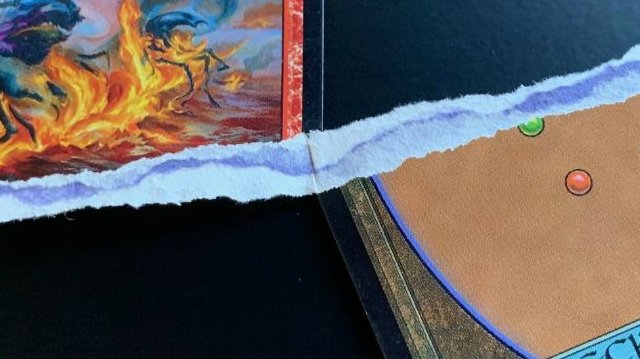
A major difference between core colors will be the opacity of the cards. Black Core or “casino grade” stock is designed to be completely opaque. This is important for casino games, but probably not for your board game.
Thickness & Weight
Before we get into the nitty gritty, I want to make one important point: thicker and heavier isn’t always better. Different paper thicknesses and weights have better and worse applications.
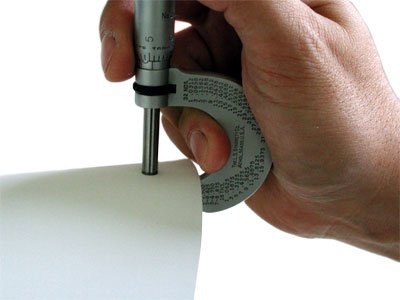
There are three methods for measuring paper weight or thickness:
Points: The only true measure of thickness, points are measured in thousandths of an inch. So, 18 point stock is 18/1000ths of an inch thick.
Grams per square meter (gsm): Is the most common measurement that you’ll find quoted. Most card stock will be between 250-400 gsm. There is a correlation between thickness and gsm, but since different papers will have different densities, there is no direct conversion.
Weight in pounds: Occasionally you’ll see the weight of a reem (500 sheets) quoted. However, since there is no standard size for a piece of paper, this measurement is pretty useless for our purposes.
Paper gsm and finish will determine the stiffness of your cards, as well as the shuffle feel. Typically for euro or poker size cards a gsm of ~300 is more than sufficient. Magic: The Gathering uses 320 gsm, Bikes & Bees playing cards are 300-310.
The larger your cards, the higher gsm you’ll typically want. This is because the flex is a function of both size and thickness. So, tarot or oversized cards should typically be thicker. Conversely high >350 gsm on poker size cards might feel unnaturally stiff.
Finish will also affect the feel and shuffle of your cards, with laminate finishes adding to rigidity.
Finishes
Once all the ink sets, a finishing layer is applied as a sealant, to protect the cards, add to the aesthetic, and durability.
There is a lot of nuance and expertise that your printer will have around the finishes they use. They’ll have considered things like safety (no one wants a poisonous card), environmental impact, oil resistance (hands are oily), durability, and shuffle feel.
I am not an expert, or a chemist, but will try and distill what I’ve learned into something cogent – with some broad strokes that will undoubtedly have exceptions.
There are two primary types of finishes, with a couple of sub-types:
Liquid Finishes: a liquid varnish is applied to the cards and then cured. There are three types of varnish:
Oil Based Varnish: This finishing was the historical norm.
UV Varnish: Is a varnish that is cured using UV light. UV varnish is stiffer than other types of varnish, and might be more prone to cracking. Historically it has only come in high gloss, but now comes in matte finishes as well.
Aqueous Varnish: Is a water-based varnish. It’s more environmentally friendly, and is the only offering at a number of manufacturers.
Laminate Finishes: are a thin film that is applied and bonded to the card stock. They typically add more thickness than liquid varnishes and can add to the stiffness of the card.
Finish Attributes
There are a number of key attributes that apply to finishes. First is the glossiness. The desired level of gloss is mostly tied to aesthetics – although there is some tactile and shuffle differences between glossiness. That is, high gloss cards can have a “stickiness” that is less common in matte cards.
Matte: Lowest reflectivity.
Satin / Mid Gloss: Medium reflectivity.
High Gloss: High reflectivity, more prone to clumping in shuffling.
While shiny gloss finishes are pretty, keep in mind that high reflectivity can reduce the accessibility of your game. My personal preference is matte, mid-gloss, or linen finish for most applications.
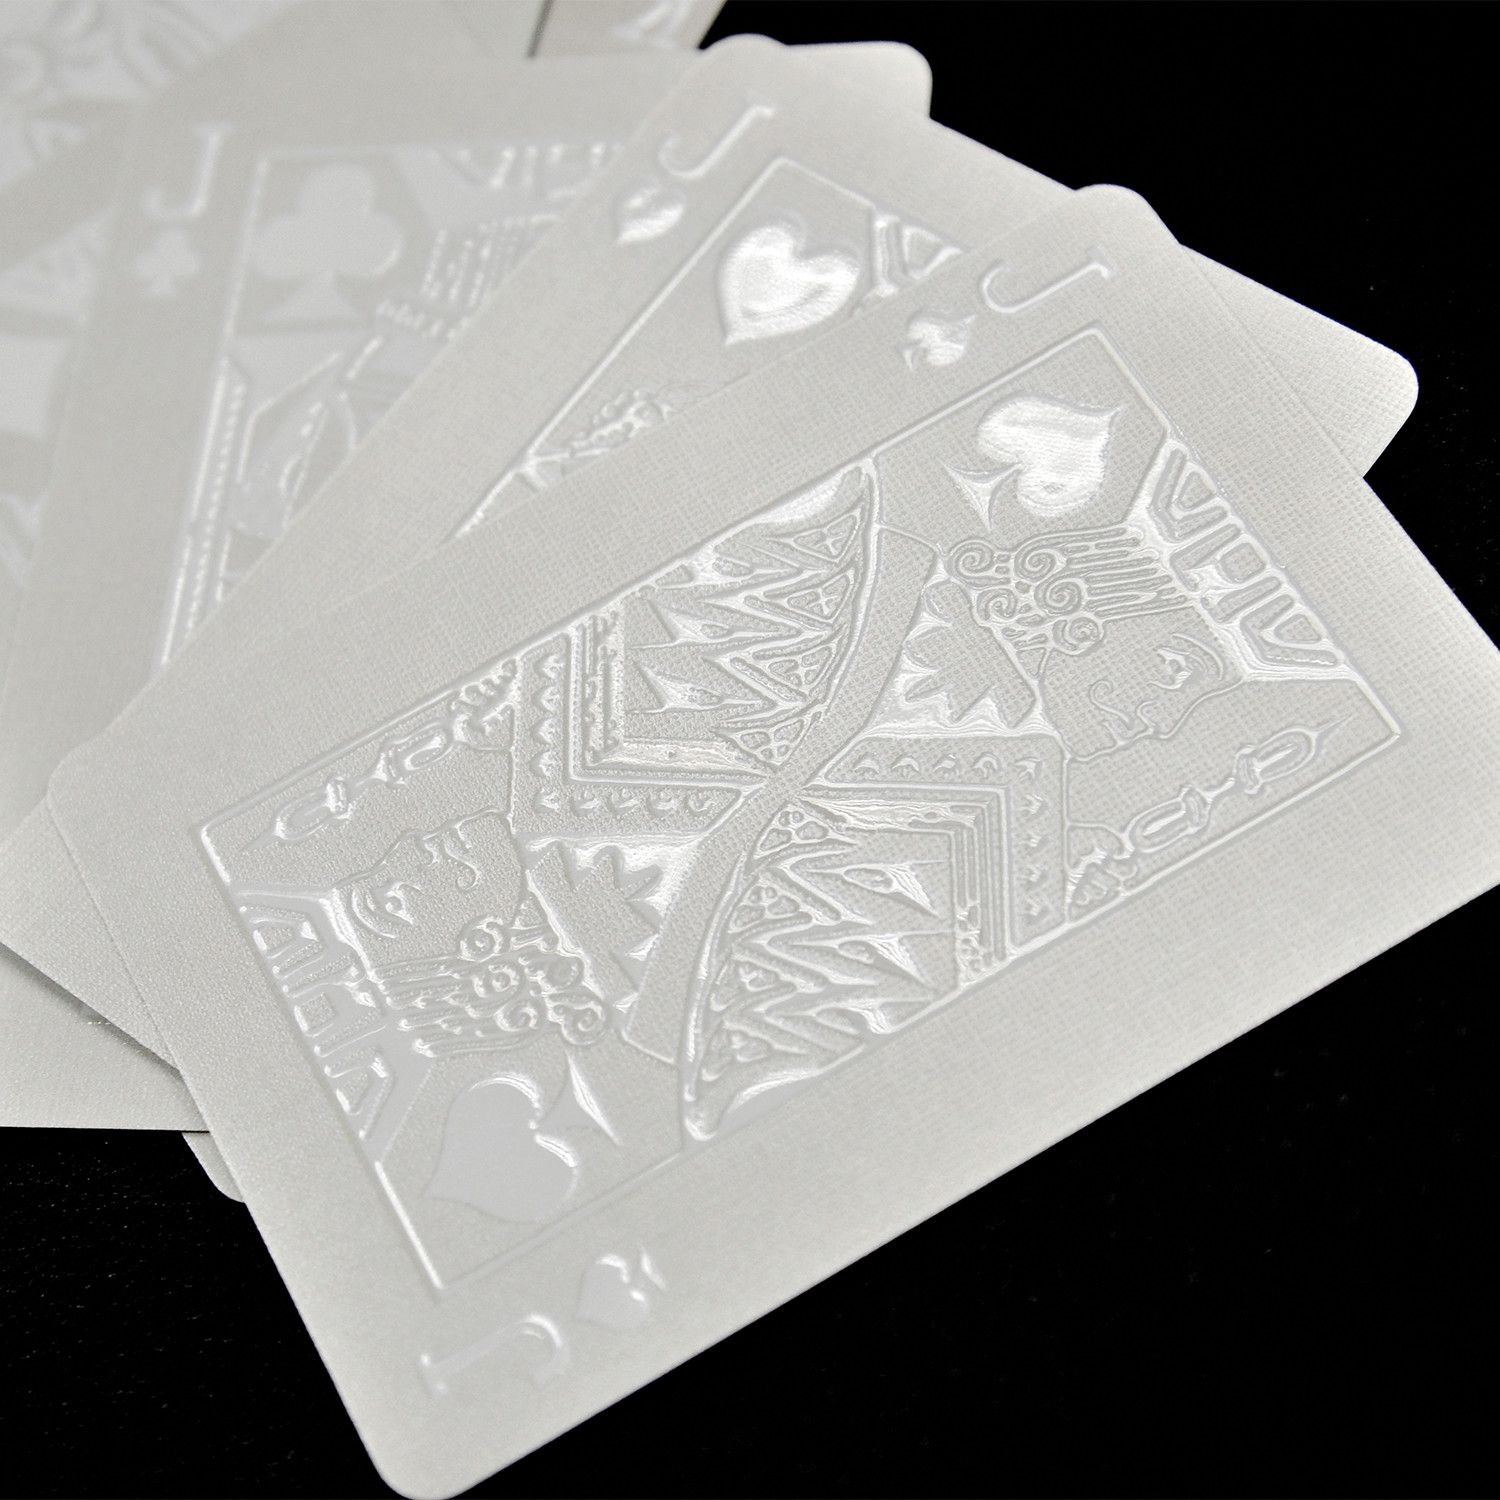
Linen Finish: is an application of cross hatching that is applied to curing varnishes. The term originates from pressing linen onto the card sheets to create the dimpling.

While other materials have replaced actual linen in the process, the benefits to the method remain the same. By creating an un-even surface (like the surface of a golf ball) the airflow around the cards is increased, improving the shuffle feel of the cards.
The linen finish also reduces the gloss of a varnish, so you won’t see high gloss linen finished cards.
Different manufacturers use different terms for what is part and parcel the same thing as a linen finish – like: air cushioned, cambric, and BETA. If in doubt, ask your manufacturer what their terminology means.
Soft Touch or Velvet Finishes: are a polyurethane finish that can be applied in a laminate or varnish. They are textured and described as feeling like smooth suede or a flower petal. Soft touch finishes are more popular for applications like book covers, although they do occasionally appear in board and card games.
Soft touch cards tend to clump and have a poorer fan. I would stay away from this finish for any component you expect to be shuffled, and only apply it on items like player boards or card boxes that you want to have a premium feel.
Decorative
Decorative elements can really make your cards stand out. And by combining multiple treatments, some truly impressive looking cards can be made.

Metallic Inks: A normal printing process uses 4 (CYMK) inks in line. Manufacturers can add a 5th metallic ink into the printing process.
Foil Film: A common kind of foiling is a foil film applied as an additional finish over an entire surface of a card. This creates a premium holographic feel to the card. But, depending on the finish and application, there can be some draw backs – namely card warping.
Cold Foil Stamping: Similar to metallic inks a 5th adhesive is added to the CYMK printing process. The card is then fed under a foil roller which adheres foiling to the specified area. The card is cured (usually UV) and then a finish is applied.
Hot Foil Stamping: A hot foil stamp is applied to the card, embossing the foil onto it. This will add some amount of texture to the card.
Spot Varnish: An additional layer of high gloss varnish is applied to specific areas of the card creating contrast, or highlighting specific card elements.
Gilding: After the card sheet is cut, cards are stacked, and then a foil, or ink is applied to the card edges. This will give the cards a colored or metallic edge. In some applications the edges are beveled and then gilded (think fancy wedding invitations).
Borderless & Gutter Cut: Cards are printed in sheets, and then cut. A normal di cuts between the cards with no excess material or edge. This necessitates a border – because not every cut will be perfect. Gutter cutting uses a di that leaves a strip or gutter between each card. This allows for full art cards, but allows for fewer cards to be printed per sheet.
What games have your favorite cards, and what sets them apart?